There may come a time when you feel the demand to burn photos to a USB stick or an SD card for whatever factor. Needs to that time show its unsightly head, you may be wondering, what kind of device suffices to finish the job in fine design. Well, the internet is filled with free ISO burners, yet today, we’re only likely to talk about one of them as well as it’s called Etcher. You see, this program is an open source tool for Windows computer systems, and it’s really simple on the eyes and easy to make use of.
We like the fact that it comes with validation built-in, therefore, one shouldn’t come across any surprises when attempting to boot from the SD card or USB drive. Furthermore, we should point out that Etcher supports ISO, BZ2, DMG, DSK, ETCH, GZ, HDDIMG, IMG, RAW, XZ, and ZIP.
Burn ISO images to SD Cards & USB
Etcher is probably the easiet ISO image burning software we’ve come across in a very long time that allows you to Flash OS images to SD cards & USB drives. The steps invloved are:
- Validate
- Select Image
- Select Drive
- Flash
Validate
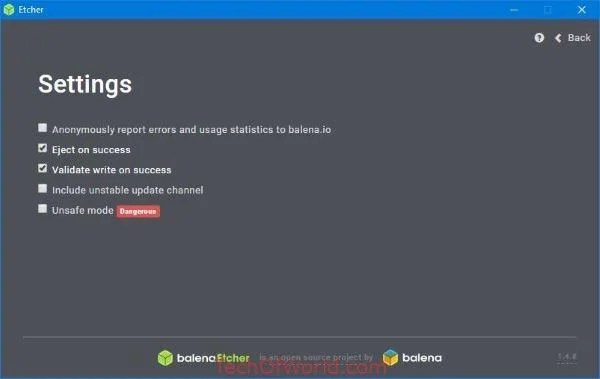
Before attempting to burn your image, you must first make sure that your files will be validated. This is on by default, but it’s always good to make sure this is indeed the case.
Simply click on the gear icon, then tick the box that says Validate write on success. Additionally, we recommend turning off sending an anonymous report to Balena. You see, this is a privacy issue, and we’re not fully certain of the data the company is collecting.
Select Image

After starting the program for the first time, you’ll be granted with a user interface that is easy on the eyes and very simple to understand. That’s because the developers chose to work with the K.I.S.S format instead of some overly difficult thing that no one is unable to get around right away.
One of the first options you’ll see is the one that says Select Image, and rightfully so. This is the button you’ll need to click on to locate the image you want to burn to your drive, so go on ahead and click on it.
Select Drive

After locating the image, you must now select the drive you want to burn the image to. Make sure the drive or SD card is connected to your computer, for that’s the only way you’ll see it.
Flash
Finally, you’ll want to get things going, and the only way to do that is to click on the button that says Flash. Depending on the size of the ISO image you’re burning and the speed of the drive, it could take a while.
We like Etcher because it doesn’t try to be a Jack of all Trades, but instead focuses on the primary purpose. Not only that, but the UI is great and was clearly designed with everyone in mind. You can download Etcher from the official website.


Leave a Comment